
Here are some simple tips for making better photos of the sky at night
What you need
Camera
Camera with a wide-angle lens, with a maximum aperture of f4.
To see a large part of the Milky Way together with some landscape, you need a lens with a shorter focal length, e.g. 14 mm. You can get reasonably cheap 14mm lenses with aperture 2.8 with manual focus for most cameras, it will be fine for most people to start with. The typical zoom lens that comes with cameras is mostly not very useful because it cannot zoom out enough to capture a large area of the sky.
It must have the option of manual focus, preferably by turning a ring on the lens.
Usinng delayed exposure is best, so the camera waits a few seconds before taking the picture after you press the shutter release button.
Batteries don't last as long when it's cold, so an extra battery can be handy.
Tripod
If it's a bit windy, it's best to have a stable tripod that isn't made of pure plastic. Some light tripods have a hook at the bottom where you can hang your bag or some other heavy item. It helps prevent the tripod and camera from tipping over and ending your photography career very quickly. It also makes the whole thing more stable, so you don't get shaky pictures.
What you need to know
Everything is more difficult when it's dark and cold. That's why it's a good idea to practice everything before you stand on a cold hilltop in the darkness on Møn.
Most people have not tried to manually focus their camera. You have to be able to, because autofocus doesn't work on stars.
You must be able to set the shutter speed and the aperture.
Aperture
Aperture is a number for how closed the lens is to light, so the higher it is, the less light comes in.
To see the faintest stars, the camera must be set to as low a number as possible. But then it is very important to focus carefully, because even a very small movement of the focus ring on the lens will turn the stars into blobs.
Exposure time
It takes time to capture the light from stars. But if the camera takes too long to collect the light, the earth has rotated so much during that time that the stars become lines.
The maximum time you can let the camera gather light depends on the focal length of the lens (shown as a number of mm on the lens), and the resolution of the camera (how many pixels the image consists of). The maximum time actually also depends on where in the sky you are photographing.
The simple way to calculate the maximum shutter speed in seconds is = 500 / focal length.
This means that with a 50 mm lens you can use a shutter speed of 500 / 50 seconds, i.e. 10 seconds.
With a 14 mm lens, you can use a shutter speed of 500 / 14 seconds, i.e. 35 seconds.
ISO
ISO stands for how much the camera amplifies the light that enters. A lot of amplification produces noise (grainy images), so you can't just crank up to the maximum ISO without consequences.
Most cameras have an optimal ISO, which you may be able to find by searching for information about the camera.
If your camera has automatic noise reduction at long shutter speeds, it's best to turn it off, as it often also removes stars, and that's not what we want.
Time delay
If you can set the camera so that it waits a few seconds to take the picture after you press the button. It's best, because then you avoid the movement of your hand causing it to shake, so that all the stars turn into doodles.
Focusing
My experience is that focus is the most difficult, because most people have never tried to focus manually with their camera. Many people don't know how to turn off autofocus, and since it's different for all cameras, we can't give a recipe for it here.
If you have "Live View" on your camera, so you can see on the screen what the camera sees and can zoom in on the image, you can probably find a star that can be seen there. Then you can slowly adjust the focus back and forth until you see the star sharpest.
But you can also take a picture where you have set the focus to the furthest away, and see if it is sharp afterwards. If not, you can turn the focus a little bit, take one more shot, and repeat until you're happy with it.
Dew
When the sun goes down and it starts to get cold, fog will quickly settle on everything, including the glass on lenses. It is not easy to wipe off. You can get special heaters for lenses, or you can use a hand warmer fixed under the front part of the lens with an elastic band. Of course, it must not get baking hot, and it is also not necessary . The glass on the lens needs to be just a little bit warmer than the air, so the fog won't settle there.
Summary
Wear plenty of warm clothes, go outside, put the camera on the tripod, and point it at the area you want to photograph. If the Milky Way is to be included in the picture, it is typically to the south.
Set the camera to manual focus, turn it on and look at the screen. Turn the focus to infinity (∞) and then slowly away from infinity until you can see sharp stars.
Set the shutter speed to the number of seconds appropriate for the lens, set the aperture to widest (the smallest number possible (eg f2.8 or f4), and the ISO to the maximum you've found your camera can handle without make excessively grainy pictures, self-timer at 2 - 10 seconds, and make a test shot.
Look at the image, zoom in to see if the stars are sharp, the image is not shaky, and that you have captured what you want to see in the image.
Adjust if not satisfied, and try again.
You can practice all that anywhere, even in daylight. But never try to take pictures of the sun!
Enjoy, and keep your feet warm!
More advanced methods
You can take pictures with longer shutter speeds if you have a tracker, which turns the camera in the opposite direction of the earth's rotation.
You can take many pictures with short shutter speeds and stack them. Then you can also use very high ISO, because the noise it produces is evened out when many images are mixed.
Post-processing on the computer is absolutely necessary when using these methods. You can find free software to process the images, and you can also buy very expensive software that can make it even better.
If the camera can capture RAW images it is much better, because it makes it possible to get the best out of the images later, using a computer.
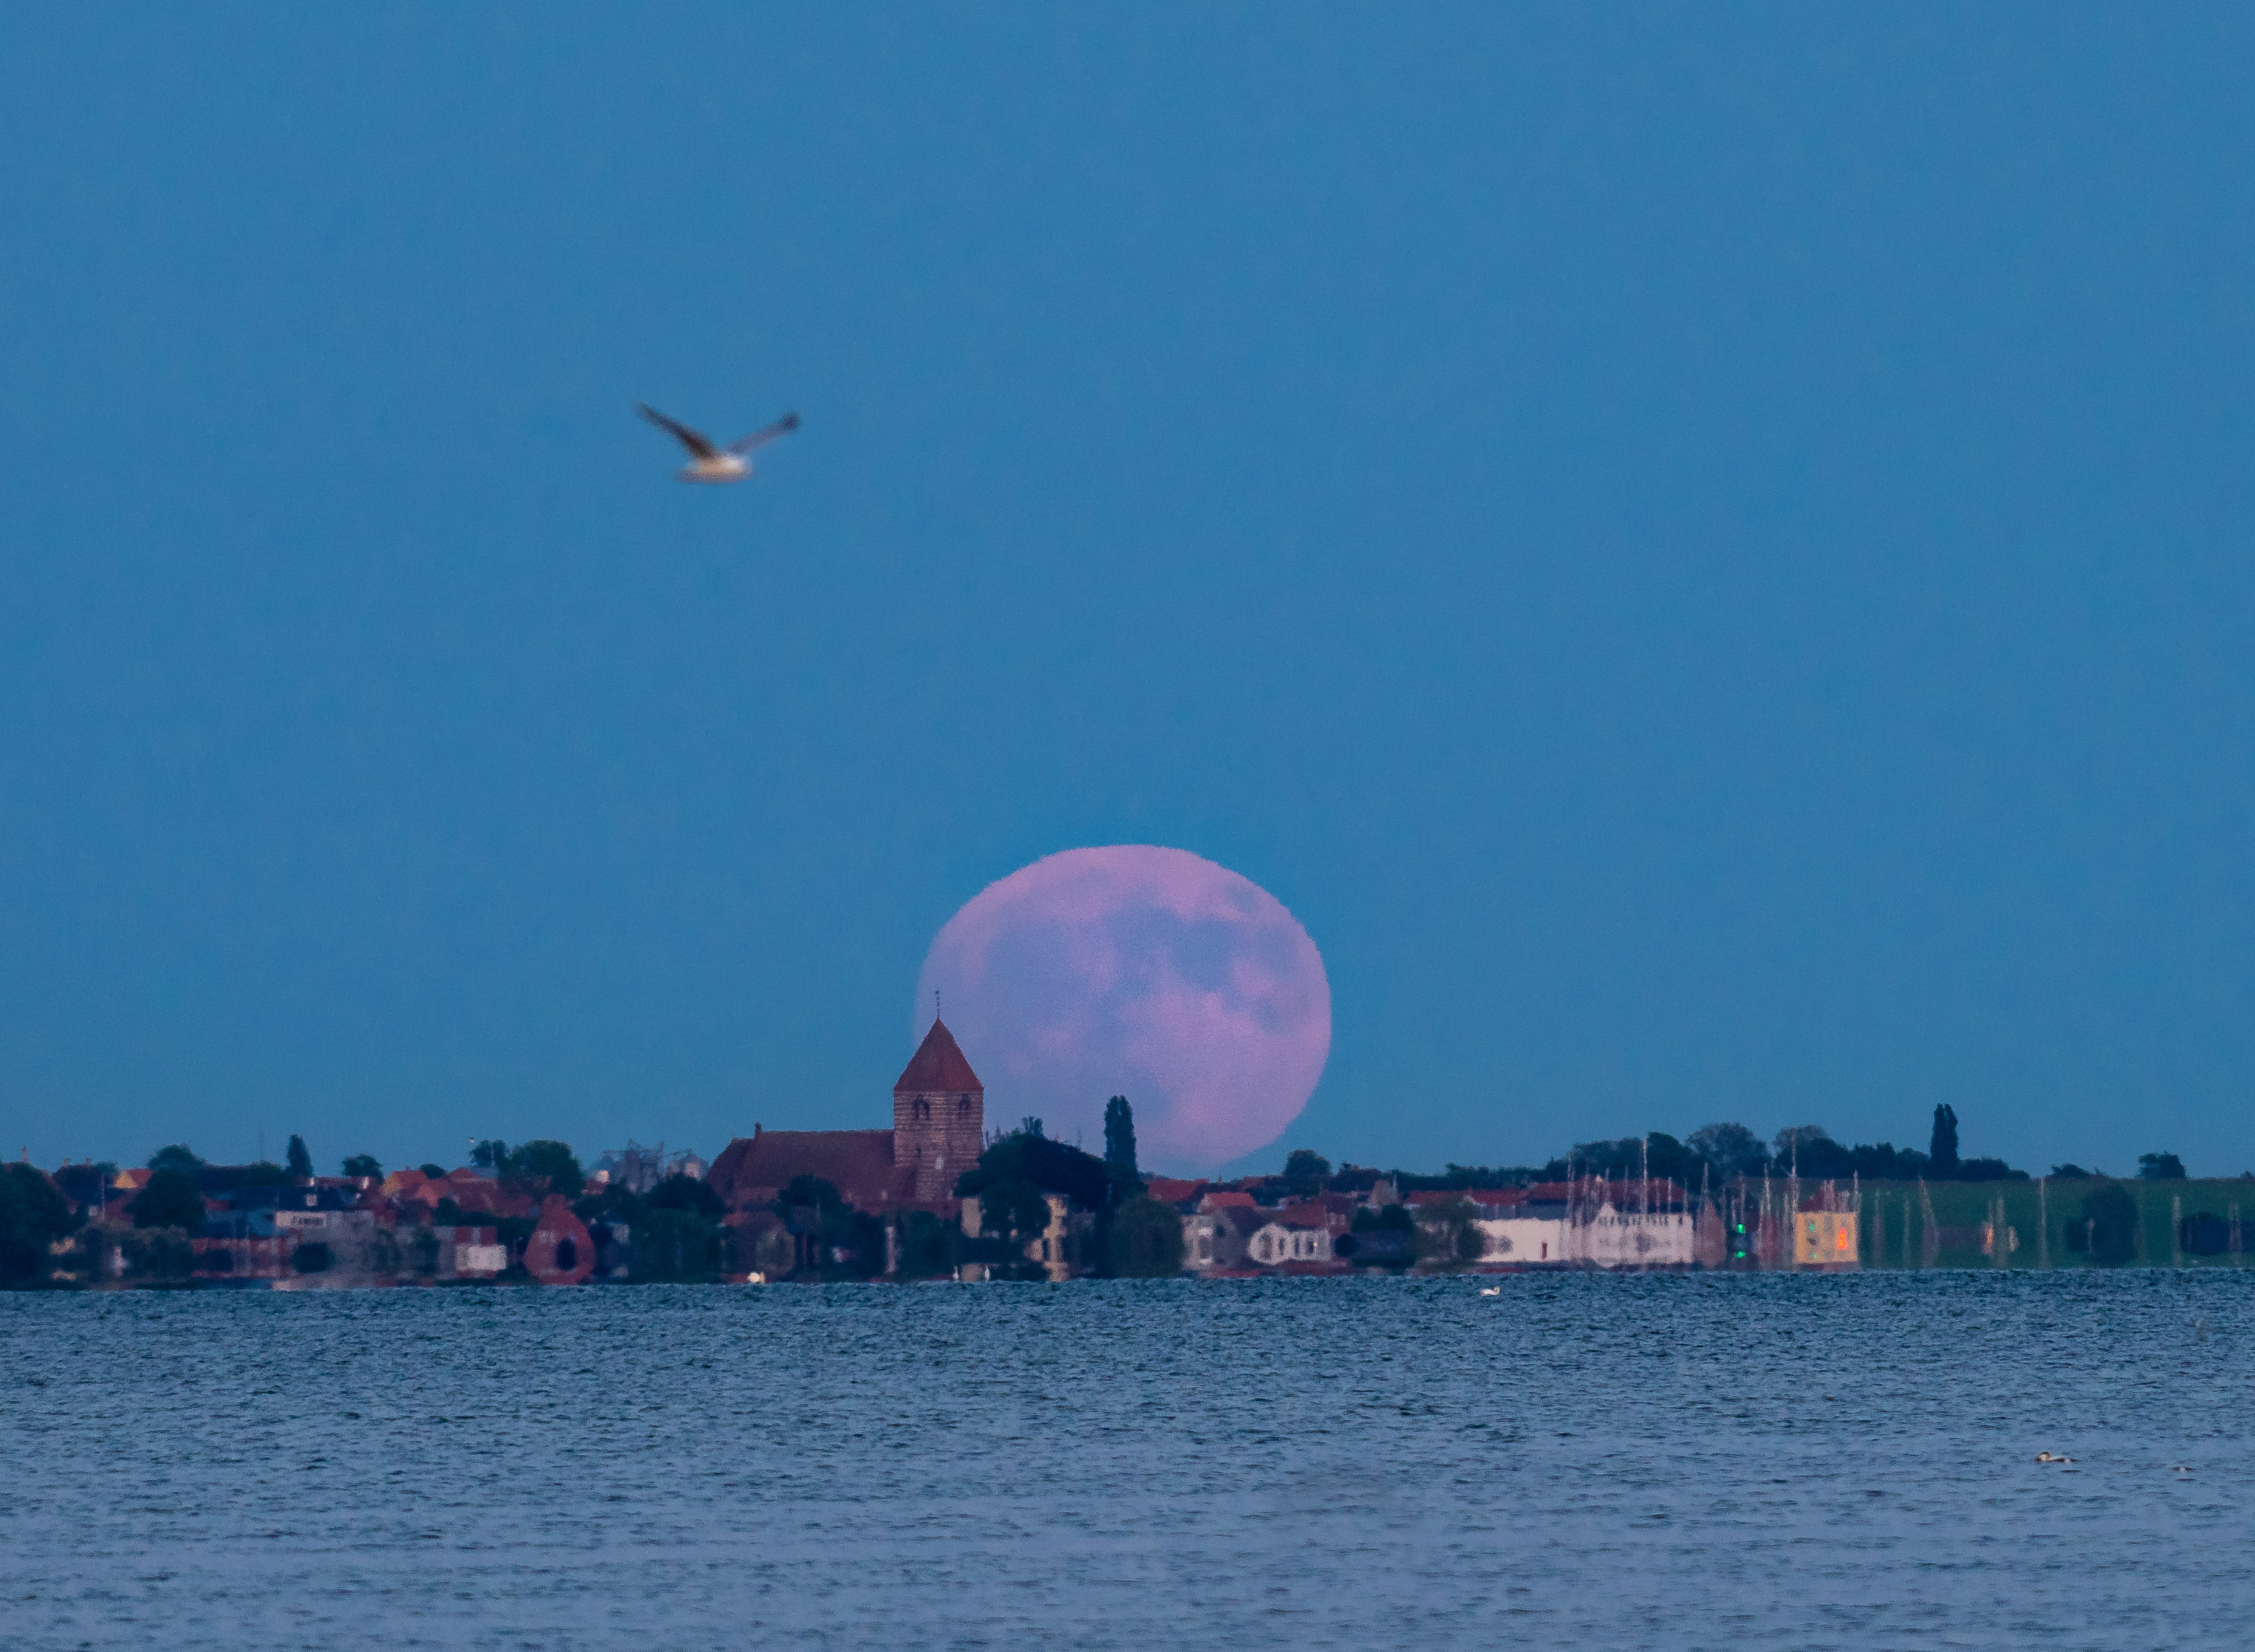
Moon Photography
The Moon is also a great subject for photography.
We have special adapters to make it easy to take stunning closeups of the moon using a phone with camera, and we can easily teach you how to capture the moonrise with the landscape around.

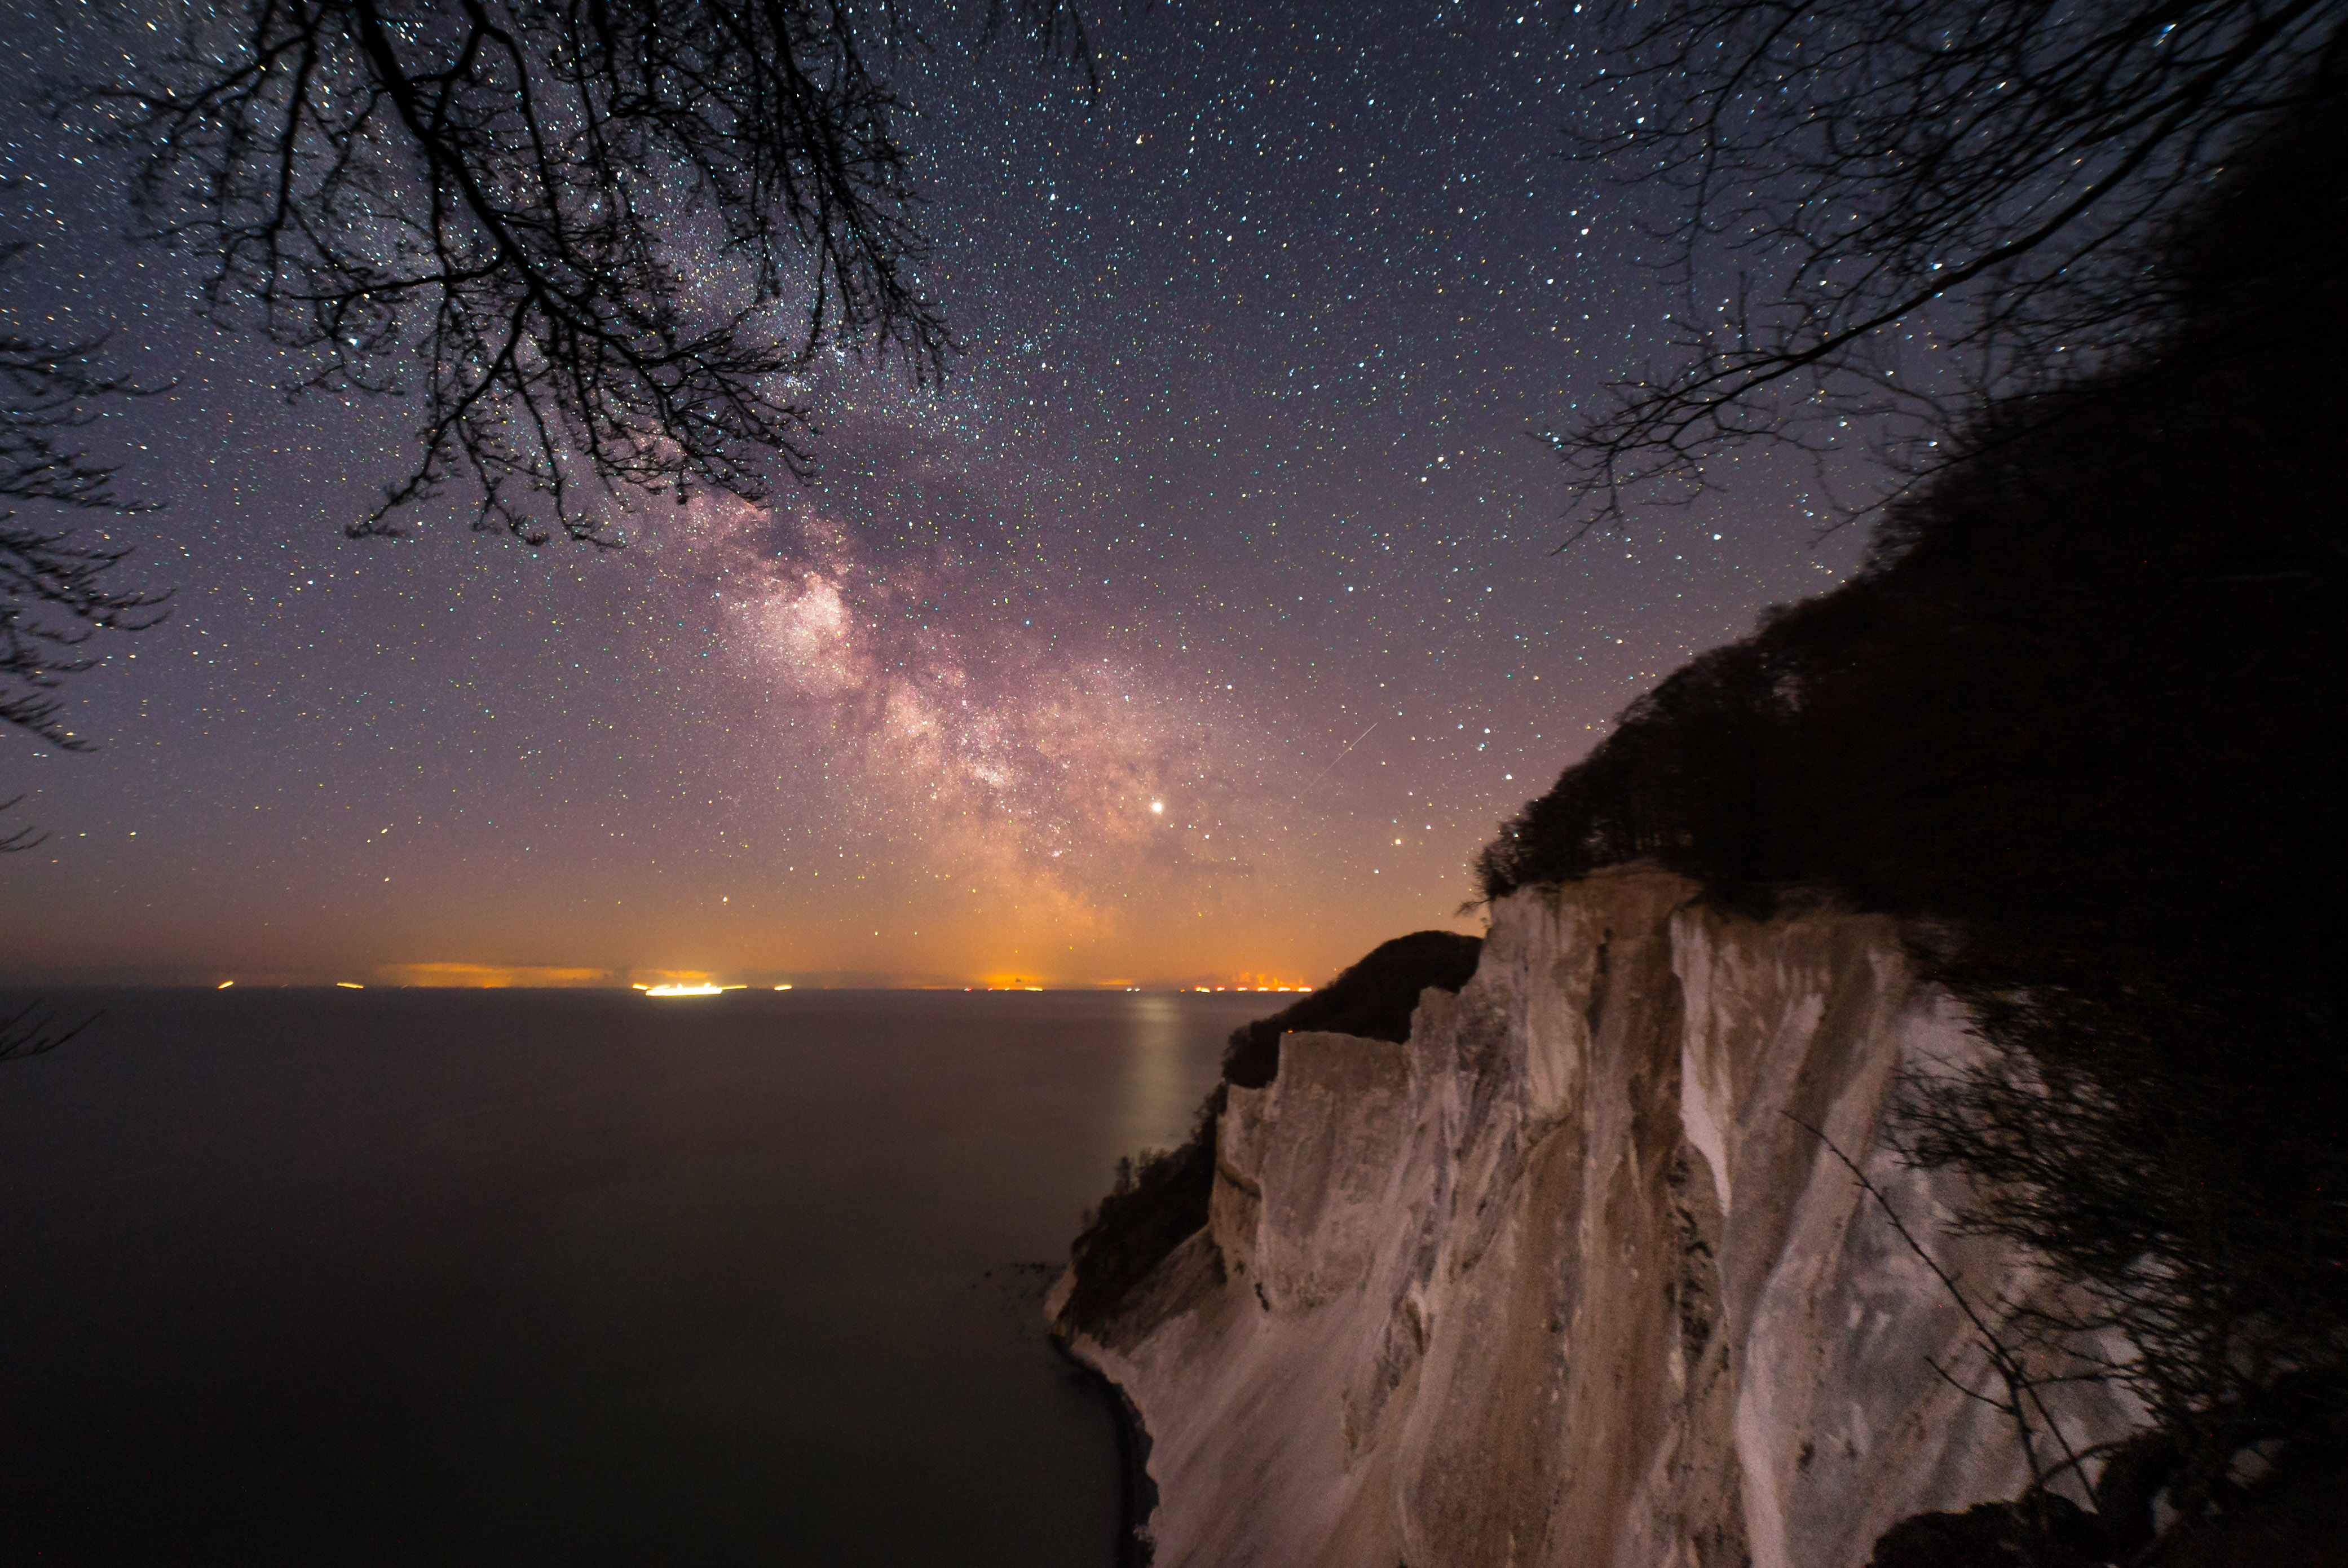
Milky Way
Example photos of the Milky Way

Moon Photography
We can arrange a trip to see and photograph the moonrise. Planning and precise timing is nececssary, but the challenge is fun and the results can be spectacular.